If you’ve ever walked down a retail aisle and paused over a cereal box with a shiny metallic logo, a beauty serum tube with an iridescent accent, or a snack pouch that glints just right under store lights, you’ve seen the work of a foil printer. As someone who’s spent the last decade supplying industrial foil printers to packaging brands large and small, I get asked this question all the time: “How do we actually use a foil printer for packaging—well,?” It’s not just about running a machine and hitting go; there’s a mix of prep work, material compatibility, and process tweaks that turn plain packaging into something that stands out on shelf, boosts brand recall, and even cuts long-term waste if done right. Let me walk you through exactly how it works, from setup to post-production, based on what our team teaches every new customer that picks up one of our printers. Foil Printer
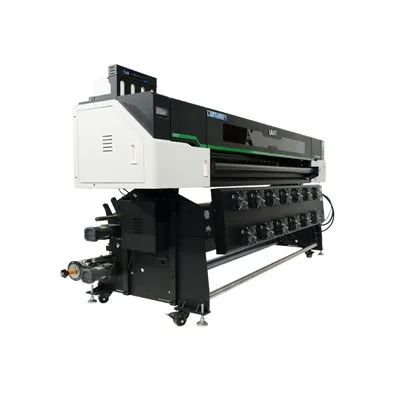
First, let’s get one thing straight: foil printing for packaging isn’t the same as the foil stamping you might remember from old school diplomas or wedding invitations. That’s often a manual, small-batch process, great for one-off jobs but not scalable for the 10,000-pack runs most consumer brands need these days. Industrial foil printers, the kind we supply, are mostly roll-to-roll machines designed to work with flexible packaging substrates—think plastic films, paper, cardboard, laminated foils, even compostable materials like PLA or biodegradable paper. They use heat, pressure, and a specialty foil (more on that in a minute) to transfer a thin layer of metal, pigment, or holographic material onto the packaging surface, creating a finish that’s way more durable than a basic ink print. It doesn’t smudge when fingers touch it, it doesn’t fade if the packaging sits in a sunlit display, and it adds that perceived value that makes a $5 snack feel premium or a $10 skincare product feel like a splurge.
The first step to using a foil printer for packaging, and the step that separates successful runs from messy ones, is prep work. A lot of new customers want to skip this part and jump straight to loading foil, but that’s where mistakes happen. Let’s break prep into three key parts: substrate selection, foil type, and die or digital design setup.
Substrate is non-negotiable. You can’t run the same foil printer on a thin, stretchy poly mailer that you would on a rigid food box, for example. For flexible packaging (snack pouches, cereal liners, beauty tubes), most brands use biaxially oriented polypropylene (BOPP), polyethylene (PE), or polyester (PET) films. For rigid packaging (boxes, cartons, clamshells), cardboard or coated paperboard is standard. Here’s the thing: not all substrates take foil evenly. If your packaging is going to get wet (say, a soup pouch or a drink carton), you’ll want a coated substrate that’s treated to prevent the foil from peeling off when exposed to moisture. If you’re making compostable packaging, you’ll need to pair your printer with a heat-set foil system that works with PLA or cellulose films—regular foil melts those materials too easily, or the adhesive doesn’t bond right. Our team always gives customers a free substrate compatibility test before they place a big run, because we’ve seen brands waste thousands of dollars running foil on a substrate that just won’t hold the finish.
Next, foil type. This isn’t the generic aluminum foil you have in your kitchen drawer. Packaging foil comes in rolls with a backing layer and a functional top layer that transfers onto your packaging. There are three main categories for consumer packaging: metallic foil (the classic gold, silver, copper that’s still the most popular), holographic foil (that rainbow sheen that shifts when you move it), and special effect foil (matte metallic, soft-touch foil, or even scratch-off foil for promo packaging). Each needs a different heat and pressure setting to transfer correctly. For example, holographic foil has a thicker top layer than metallic foil, so you’ll need to raise the printer’s temperature by 10-15 degrees Celsius and increase pressure slightly to make sure every iridescent detail transfers. If you set it too low, you’ll get patchy areas; too high, and you’ll burn the substrate or the foil backing will stick to the packaging. New customers often pick the cheapest foil roll they can find, but we warn them: cheap foil has weaker adhesive, so it will peel off packaging during shipping or on store shelves. We only supply foils tested for packaging durability, because a brand’s packaging that looks damaged before it even hits the shelf is a lost sale.
The third part of prep is design setup for the printer. Foil printing isn’t like ink printing, where you just drop a logo into a design file. For foil, you need to create a “stop” layer, which tells the printer where to transfer the foil—any part of the packaging that’s not supposed to have foil is covered by this stop layer. For older foil printers that use metal dies, this stop layer is a physical die that presses onto the packaging to block foil transfer, but most modern roll-to-roll printers (the ones most brands use now for mid to large runs) are digital. That means you upload a digital file to the printer’s system, and it uses heat and pressure only where the stop layer is, so you can print multiple foil designs on the same roll without changing dies. The key here is to keep foil areas simple. Fine lines smaller than 1mm often don’t transfer evenly with foil, because the thin foil layer breaks apart. If you have a tiny logo, thicken the lines to at least 1.5mm, or add a slight outline to make it more durable. Our design team offers free design consultations for every customer, because adjusting a design file before the first run is way cheaper than reprinting 50,000 packaging units.
Once prep is done, it’s time to load the printer and calibrate. This is the step where experience matters a lot—our technicians spend three days training new customers on this, because even small calibration errors ruin runs. First, you load the substrate roll and the foil roll into the printer’s loading slots, making sure both are aligned perfectly. If they’re off by even a millimeter, you’ll get foil printed in the wrong place, creating a misaligned logo or a design that looks messy. Next, you calibrate the temperature and pressure. This is where test strips come in. You run a 1-inch strip of foil and substrate, adjust the temperature in 5-degree increments until the foil transfers evenly without smudging or leaving residue. For flexible substrates, the pressure is usually lower than for rigid ones—too much pressure on a thin plastic pouch will stretch it, making it unusable. For cardboard cartons, you need higher pressure to make the foil sink into the surface enough to stick, but not so high that you crease or bend the cardboard. We always tell customers to do 3-5 test runs before starting their full production, because substrates and foil can vary slightly from roll to roll, even if they’re the same product.
Once calibrated, you can run the production. Modern foil printers for packaging are fully automated, which is why they’re scalable. You just input how many feet of packaging you need, and the machine runs on its own, stopping only if it detects a jam, low foil, or substrate issue. But that doesn’t mean you can walk away entirely. We recommend having a staff member check the run every 10-15 minutes for the first hour, to make sure the foil is transferring correctly. Common issues during runs include foil tearing, which usually happens if the temperature is too high or the tension on the foil roll is too tight, or patchy areas, which means pressure is too low. Most of these issues are easy to fix mid-run, but if you don’t catch them early, you can waste hundreds of feet of packaging.
After production, you have a few post-run steps that affect the final packaging’s quality and shelf life. First, you need to let the foil sit for 24 hours before finishing the packaging (like cutting, sealing, or printing ink over it). The adhesive needs time to fully cure, so if you seal a snack pouch right after foil printing, the seal will melt the foil or break the bond. Second, you need to check for adhesion. The easiest test is to rub a finger firmly over the foil area—if it smudges or comes off on your skin, the adhesive didn’t cure right, and you’ll need to adjust your settings for the next run. Third, store finished foil rolls of packaging in a cool, dry place, away from direct sunlight. UV rays can fade metallic foil over time, and high humidity can make the adhesive weaken, leading to peeling.
Now, why does this matter for packaging brands? Foil printing isn’t just a cosmetic upgrade. It’s a functional one too. For food packaging, foil provides an extra barrier against moisture and oxygen, extending the shelf life of products like nuts or coffee. For premium beauty packaging, it adds a tactile feel that makes the product feel high-end, so brands can charge more. For promotional packaging, scratch-off foil or holographic foil encourages customers to interact with the product, leading to higher engagement on social media. But only if it’s done right. I’ve seen brands buy cheap, untested foil printers and foil rolls, and their packaging ends up with peeling foil, misaligned logos, or smudged foil that makes the product look cheap. That’s why our team doesn’t just sell printers—we sell support, from prep consultations to on-site training, because we want our customers’ packaging to stand out, not get returned.
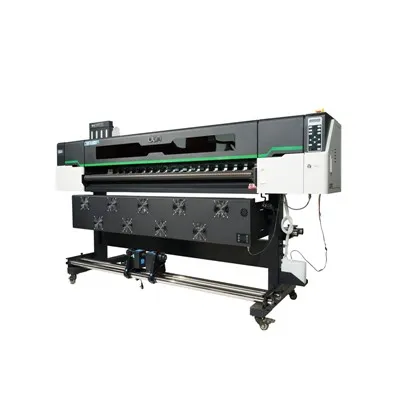
If you’re a packaging brand looking to add foil printing to your production line, or you’re upgrading from manual stamping to scalable industrial foil printing, we’re here to help. We work with brands of all sizes, from small craft businesses doing 1,000-unit runs to large consumer goods companies doing 1,000,000-unit runs, and our printers are built for durability, easy calibration, and compatibility with all types of packaging substrates. We also offer custom foil testing and design support to make sure your first run is perfect, no wasted time or money. If you’re ready to learn more about how foil printing can elevate your packaging, reach out to start a conversation about your specific needs.
Sublimation Printer When researching this guide, I drew on two key industry resources to make sure the advice is accurate and up to date. First, the Flexible Packaging Association’s 2023 Technical Guide to Decorating Flexible Films, which outlines best practices for foil transfer on common packaging substrates and common troubleshooting tips. Second, the Foil Printers Association’s 2024 Sustainability Report, which covers how modern foil printing can reduce packaging waste by cutting the need for extra ink or protective coatings, making foil printing a more sustainable option than many other decorating methods. These resources helped me make sure the steps I shared aren’t just based on our team’s experience, but on industry standards that keep packaging production efficient and high quality.
Hangzhou Yulan Technology Co., Ltd.
Hangzhou Yulan Technology Co., Ltd. is one of the most professional foil printer manufacturers and suppliers in China. With abundant experience, we warmly welcome you to wholesale the newest foil printer in stock here from our factory. Good service and quality products are available.
Address: Building, No.128 Rihui Road, Linping District, Hangzhou, China.
E-mail: ulinprint@gmail.com
WebSite: https://www.ulinprinter.com/
