When I first started out as a tattoo artist back in 2008, I used to think a quality tattoo motor was all you needed to turn a blank skin canvas into something lasting. I carried a single rotary machine, a handful of needles, and a bottle of green soap in a beat-up leather tool bag, and I figured that was enough to get the job done. That all changed the first time a client came back with a blown-out line—turns out I’d skipped a tiny, inexpensive accessory that would’ve kept the machine running smoothly, steady, and safe for both me and the client. Now, as a supplier who works with tattoo artists and studio owners across North America, I see how many people undervalue the small add-ons that turn a good tattoo motor into a game-changing tool for consistent work. Let’s break down the essential accessories you can’t afford to miss, why they matter, and how they fit into both a beginner’s setup and a professional studio rig. Tattoo Motor
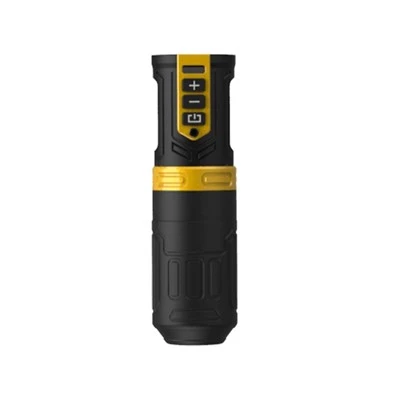
First on the list is something most artists will glance over until their motor dies mid-session: a premium tattoo motor grip and tube assembly. Wait, before you dismiss this as just “handle stuff,” hear me out. The grip is your direct link between the machine and your hand, so its weight, grip texture, and balance directly affect how steady your hand stays during lining and shading. A cheap plastic grip might feel light, but it can slip when your hand sweats mid-detail work, leading to uneven lines that require touch-ups. A high-quality aluminum or stainless steel grip, on the other hand, has a comfortable, non-slip finish, and when paired with a matching tube, it ensures the needle moves in a straight line without any wobble. Wobble is the enemy of good tattoos—if the needle drifts even a little, you’ll end up with a blurry line or broken shading. At my supply company, we’ve worked with artists to test grip-tube combinations on rotary and coil motors alike, and we’ve found that adjustable grips let you tweak the length to match your preferred hand position, whether you’re working on a small wrist tattoo or a large back piece. Another thing to note: always pair your grip with a single-use, sterile tube for each client. Reusing tubes is not only unhygienic—it can lead to tiny burrs on the inside of the tube that catch the needle and cause it to jerk. Sterile tubes are cheap, and skipping that step is a risk you don’t want to take for either yourself or your client.
Next, a power supply that’s calibrated specifically for your tattoo motor type. A lot of beginners will grab a generic power supply from a big-box art store, but tattoo motors run on very specific voltage ranges, and mismatching that can lead to subpar results or even damage the machine. Rotary motors, which are the most popular these days, usually run between 4.5 and 12 volts, while older coil motors might need a higher, more consistent current to fire correctly. A good power supply doesn’t just turn the machine on and off—it lets you adjust voltage in small increments, which is critical for different tattoo work. For lining, you need a lower voltage (around 5 to 7 volts) to keep the needle moving fast enough to create sharp, crisp lines without puncturing too deep. For shading, you’ll bump it up to 7 to 10 volts, so the needle deposits pigment smoothly without blowing out the skin. I’ve heard too many horror stories from artists who used a power supply with no voltage control: they’d crank it too high for lining, and the needle would skip, leaving a patchy line, or too low for shading, leading to patchy color. At our supply company, we stock digital power supplies with a display that shows exact voltage, so you never have to guess. We also recommend power supplies with a safety cut-off feature—if the motor overheats (which happens after long sessions), the supply will shut off temporarily to protect both the machine and the client’s skin. That’s a small feature, but it saves you from ruining a session and potentially getting a bad review from a client.
Then there’s the needle cartridge system, which has transformed tattoo work over the past decade, and it’s a non-negotiable accessory today. Let’s be clear: old-style loose needles and tubes are still around, but needle cartridges are designed to work seamlessly with modern tattoo motors, and they eliminate a lot of the messy, risky parts of setting up a needle. A cartridge is a pre-sterilized, sealed unit that holds the needle in place, so there’s no threading a needle by hand, no chance of a needle bending mid-session, and no risk of cross-contamination. The type of cartridge you choose depends on your motor—some rotary motors are built specifically for cartridge compatibility, while coil motors can work with them if you have the right adapter. What I love about cartridges is the variety: there’s round liners (for thin, tight lines), round shaders (for solid color), magnums (for shading large areas), and even bugpins, which are super tight for delicate line work like script or small tattoo details. One mistake I see artists make is using the wrong cartridge count for their work: a 5RL (round liner) cartridge is great for small lines, but a 9RL might be too thick for a wrist tattoo, leading to a line that’s too heavy. As a supplier, we work with artists to match cartridge size to their motor’s power output, so the needle moves smoothly without dragging or skipping. Also, always use brand-name cartridges—cheap off-brand cartridges often have loose needles or poor insulation, which can cause the needle to vibrate unevenly or even inject pigment incorrectly. We’ve tested off-brand cartridges in our workshop, and the ones that cost half as much as name-brand ones usually break after a few uses, or the needle bends in the middle of a line. That’s a waste of money and a risk to your work.
Another essential accessory that’s easy to overlook: a motor calibration tool. Wait, calibration? For years, I thought calibrating a tattoo motor was something only experienced technicians did, but it’s actually a simple step that keeps your machine running consistently. Calibration adjusts the needle’s stroke length—how far the needle moves in and out of the grip—for different work. For example, lining usually needs a shorter stroke (around 2 to 3 mm) so the needle doesn’t puncture too deep into the skin, which would cause scarring. Shading, on the other hand, needs a longer stroke (3 to 4 mm) to deposit enough pigment under the top layer of skin. If your motor is out of calibration, your stroke length will change mid-session, leading to inconsistent lines or patchy shading. A calibration tool is a small, affordable tool that lets you adjust the eccentric cam (the part that moves the needle) on rotary motors, or the contact screws on coil motors, to get the perfect stroke length. I’ve seen artists who never calibrate their motors: they’ll crank the voltage high to compensate for a short stroke, leading to the needle digging into the skin, or they’ll run the motor low, leading to slow, uneven line work. At our supply company, we include a calibration guide with every motor we sell, and we recommend calibrating your motor before every session, especially if you’re using it for different types of work. It’s a 5-minute step that makes a huge difference in the quality of your tattoos.
Let’s not forget about accessories for maintenance and safety—because a well-maintained motor lasts longer, and a safe motor keeps both you and your client protected. First, a set of motor cleaning brushes and lubricant. Tattoo motors, especially rotary ones, have moving parts that get filled with ink, skin dust, and old pigment after each use. If you don’t clean them regularly, the moving parts will grind against each other, leading to friction, overheating, and eventually, a broken motor. I’ve had artists come to us with motors that are only a year old, and they say “it just stopped working”—turns out they never cleaned the eccentric cam, so the ink had solidified and locked the needle. A small, soft brush (we make custom brushes for our motors) is perfect for getting into the tiny crevices, and a silicone-based lubricant (not oil, which can get into the skin or cause contamination) keeps the moving parts running smoothly. We also recommend a motor storage case— a hard, protective case that keeps your motor, grip, and other accessories safe from scratches and drops when you’re moving between studios or to a client’s house. Drops are a common cause of motor damage, and a $30 storage case is way cheaper than replacing a $500 motor.
Safety accessories are just as important as the ones that affect your work. A set of disposable rubber bands to secure the grip tube, a roll of sterile adhesive tape to hold the cord in place (so it doesn’t get tangled around your hand mid-session), and a pair of insulated tweezers to remove any loose needles from cartridges (instead of using your fingers, which can get ink on the needle). Also, don’t forget a replacement power cord—cords get frayed over time, especially if you’re rolling them up and putting them in your bag. A frayed cord can cause a short circuit, which is a fire hazard, or even give you a small electric shock mid-session. It’s always a good idea to have a spare cord on hand, just in case. When it comes to safety accessories, I can’t stress enough that cutting corners is not worth it. A client came to our studio once with an infection that she said came from a tattoo artist who reused a grip tube, and that cost her a lot of money in medical bills and the artist a lot of work. The small cost of sterile tubes, single-use needles, and safety gear is nothing compared to the risk of a bad outcome.
Now, let’s talk about how these accessories work together for a complete setup. A rotary tattoo motor paired with a high-quality adjustable grip, a digital power supply with voltage control, brand-name needle cartridges, and a calibrated stroke length will give you consistent, sharp lines and smooth shading. Add in the maintenance tools, a storage case, and spare cords, and you have a setup that will last for years, even with daily use. As a supplier, I’ve seen artists who buy a $1000 tattoo motor and then use a $10 grip and a generic power supply, and they wonder why their work doesn’t look as good as the artist next door who has a $500 motor but invests in quality accessories. It’s not just about the motor—it’s about the whole system working together.
Let me share a quick story to illustrate that. Last year, a new tattoo artist came to us because her motor was leaving all her lines fuzzy. She had a popular rotary motor, but she was using cheap grip tubes from a discount supply shop and a power supply that only had three voltage settings. We helped her upgrade to a stainless steel grip, a digital power supply with adjustable voltage, and precision needle cartridges. After her next session, she sent us a photo of a line work tattoo that was so crisp, the client said it looked like it had been done by a 10-year experienced artist. She told us she couldn’t believe the difference a $200 investment in accessories made, compared to the $1000 motor she already had. That’s the truth—accessories turn a good motor into a great tool.
If you’re a beginner just building your first setup, don’t feel like you need to buy all these accessories at once. Start with a quality tattoo motor, a mid-range power supply, and a pack of sterile tubes, then add grip tools, cartridges, and calibration tools as you gain experience. For studio owners, investing in durable, high-quality accessories will save you money in the long run—less downtime for broken motors, fewer touch-ups, and more happy clients who will refer you to their friends.
At the end of the day, the best tattoo motor is only as good as the accessories you pair it with. Every part works together: the grip gives you control, the power supply gives you the right current, the cartridges give you precision, and the calibration gives you consistency. If you’re looking to upgrade your setup, or you’re just starting out and want to make sure you have everything you need, we’re here to help. Whether you have questions about which grip works best with your motor, which voltage setting is right for lining, or what cartridges are best for fine line work, our team can walk you through what will work for your style and budget.

If you’re ready to pick the right accessories for your tattoo motor and build a setup that helps you create consistent, high-quality tattoos, get in touch to discuss your specific needs. We’re here to provide guidance, not just products, because we know that the right tools make all the difference for any tattoo artist, no matter their skill level.
Tattoo Machine References
Tattoo Industry Association. (2022). Essential Equipment Guidelines for Professional Tattoo Studios.
Lee, S. et al. (2021). Needle Precision and Tattoo Outcome: A Comparative Analysis of Cartridge vs. Loose Needle Systems. Journal of Tattoo Art and Safety.
Miller, K. (2019). Maintenance Calibration for Rotary Tattoo Motors: Best Practices for Longevity. Professional Tattoo Supply Journal.
Zhuji Taituo Machinery Technology Co., Ltd.
Zhuji Taituo Machinery Technology Co., Ltd. is one of the best tattoo motor manufacturers and suppliers in China for over 20 years, also supports customized service. Welcome to buy advanced tattoo motor made in China here and get quotation from our factory. For price consultation, contact us.
Address: 101, Building 12, Youdi, No. 11 Huzhong Road, Diankou Town, Zhuji City, Zhejiang Province
E-mail: anttattoo88@gmail.com
WebSite: https://www.antinktattoo.com/
